Showing posts with label Dime Designed DIY. Show all posts

Monday, December 16, 2013

Thanks a "Latte"- Coffee Gift

It's the most wonderful time of the year and you know what that means!!

PRESENTS!

Yep, Presents for everyone. The list can be long and it can get pricey.

This makes a really cute, friend, co worker, teacher or whoever likes coffee gift and it can be really cost effective.

I call it the

"THANKS A LATTE"

You will need

Flavored Chocolate Melts or chocolate morsels ( you can choose whatever flavors you'd like, but I chose pumpkin spice and white chocolate peppermint)

Plastic Spoons

coffee Mug

Small coffee pack 

Tissue Paper

Treat Bags to wrap it all in.


Step one- Gourmet Chocolate Stir SPOONS
 Melt the chocolates and dip in the plastic spoons. Lay on foil or parchment paper to harden


I dipped the white chocolate ones in crushed candy canes.


Once Hardened, decorative wrap them. I bought treat bags and just cut them.

STEP TWO- Arrange your goodies into your mug. 
I used tissue paper to prop things up so they looked nicer. (but I forgot to take a pic of that step. :/ opps)


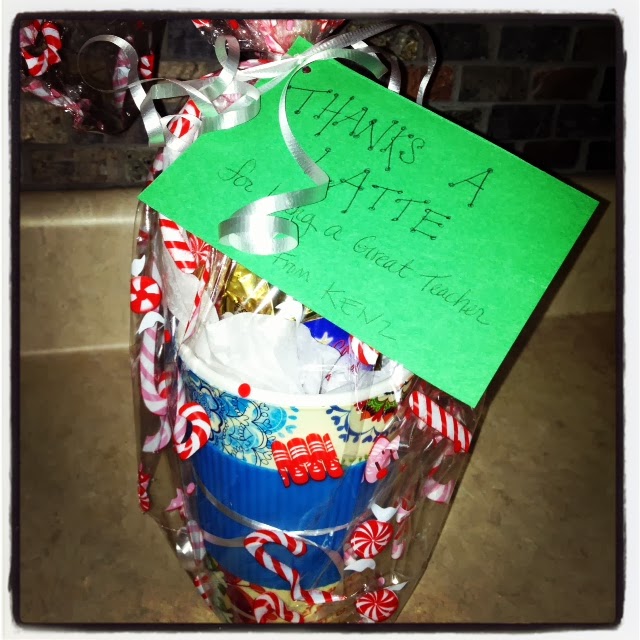
Step Three- "THANKS a LATTE" for being a great......

And you can fill in the blank with whatever you want.


THE FINISHED PRODUCT

An affordable and unique gift for the many "someones" in your life that you want to show appreciation to for Christmas!!

My whole gift cost just under $5.

Happy Gifting!!


Thursday, November 21, 2013

Dime Designed DIY- Goodwill Canvas Repurpose

So, This week I've been a crafting maniac. Literally have done about 5 projects. Which is AWESOME!  I guess this no Facebook thing really has benefits. You can click the link to read about that if you want.
But seriously I've had so much time to do things I love and that makes me feel great!!

Anywhoo, I want to share my latest project with you.

It's my....

GOOD WILL CANVAS REDO!!!

This is what they looked like before. I got these babies for $1.50 a pc at Goodwill (IheartGoodwill)

I obviously wasn't in love with these floral beauties, so I decided to try my hand at redoing them with one of my favorite products.

MODPODGE
If you've never used it and you're a crafter..you don't know what you're missing!

So, I grabbed my modpodge, my foam applicator, and some pages from an old book I got at a garage sale like 9 years ago and I went to work.


Following the directions on modpode I applied a thin layer to attach the papers. I ripped them and placed them in various directions.
Then I put a layer on top of each piece as well.

this is what it looked like after I was done. I applied another layer of Modpodge all over the top and sides to keep the papers securely in place.

LET DRY WELL!!!


then I grabbed some cute letters I bought from Micheals. I got a whole tablet full of die cut letters in one pack. 

The letters were not the color I needed to match our master bedroom which is where I planned to hang these. So I decided to use these as stencils.

I traced around each one with light pencil and used Painters Paint Markers from walmart. TO fill in the letters.


I continued on until they both were done!!!

Here's my final product!!!!!!


I love how these turned out. They will be perfect for our Master Bedroom.

I love that I only spent $1.50 a piece!!!


Stay tuned for more Dime Designed DIY ideas!!

Now that I'm facebook free. I'll be doing MUCH more. ;)

Happy Crafting